
A field in Harvest Mate is more than just a shape on the map — it holds your operations, your costs and your harvests, season after season. This guide takes you from an empty farm to a fully drawn field, ready for you to start logging work.
Before you begin
Take a minute to understand the three building blocks behind every field. They sit one inside the other:
- Field — The permanent identity of your land. It has a name and an optional code (useful if you label your fields with internal numbers). The field itself never changes from year to year.
- Field season — One fiscal year on that field. Each season carries its own boundary on the map and its own land wage. This is what lets the shape of a field change between years.
- Field culture — A crop grown on a season. A single season can have several cultures, and each culture is what carries the subsidy information.
In this guide you'll create a field and its first season. Cultures come later, when you plan the crops for the year.
Step 1 — Open the field editor
There are three ways into the field editor — pick whichever one is in front of you right now:
- From the dashboard prompt. Right after creating your farm a dialog appears telling you your farm is still empty. The button inside that dialog takes you straight to the field editor.
- From the dashboard, any time. Look at the bottom-right corner of the dashboard map. There is a button there that opens the field editor in one click.
- From the sidebar. Hover over the Dashboard item in the left sidebar — a three-dot menu (⋯) appears on the right. Click it and choose Create field.
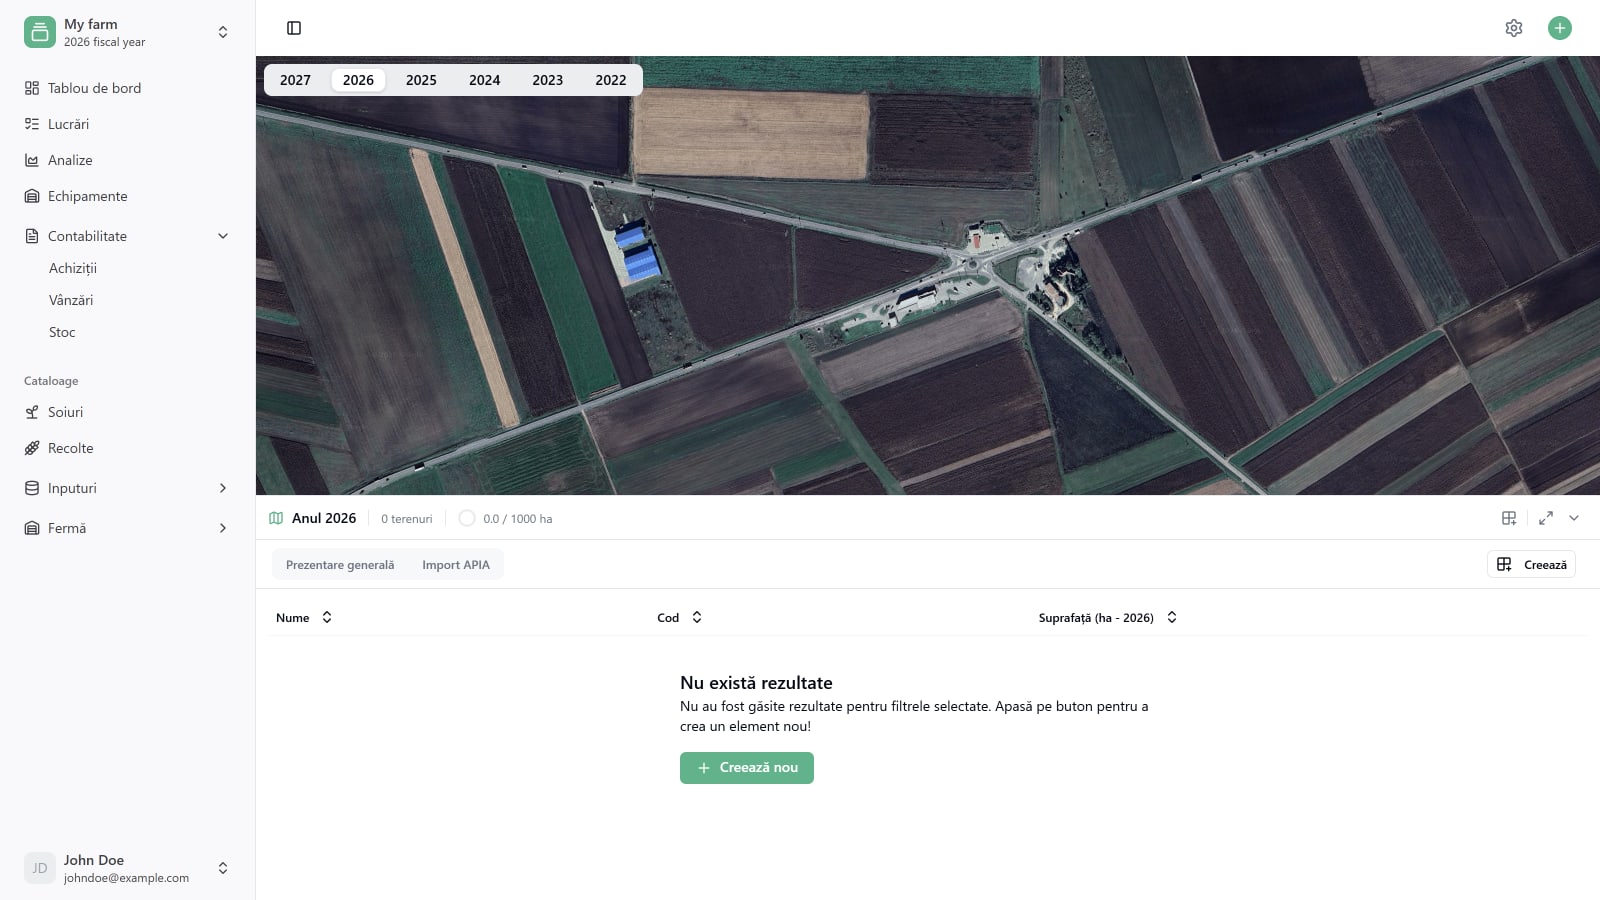
All three paths land you in the same place: an empty field editor showing the current fiscal year at the top and an empty list of fields underneath.
Step 2 — Create the field
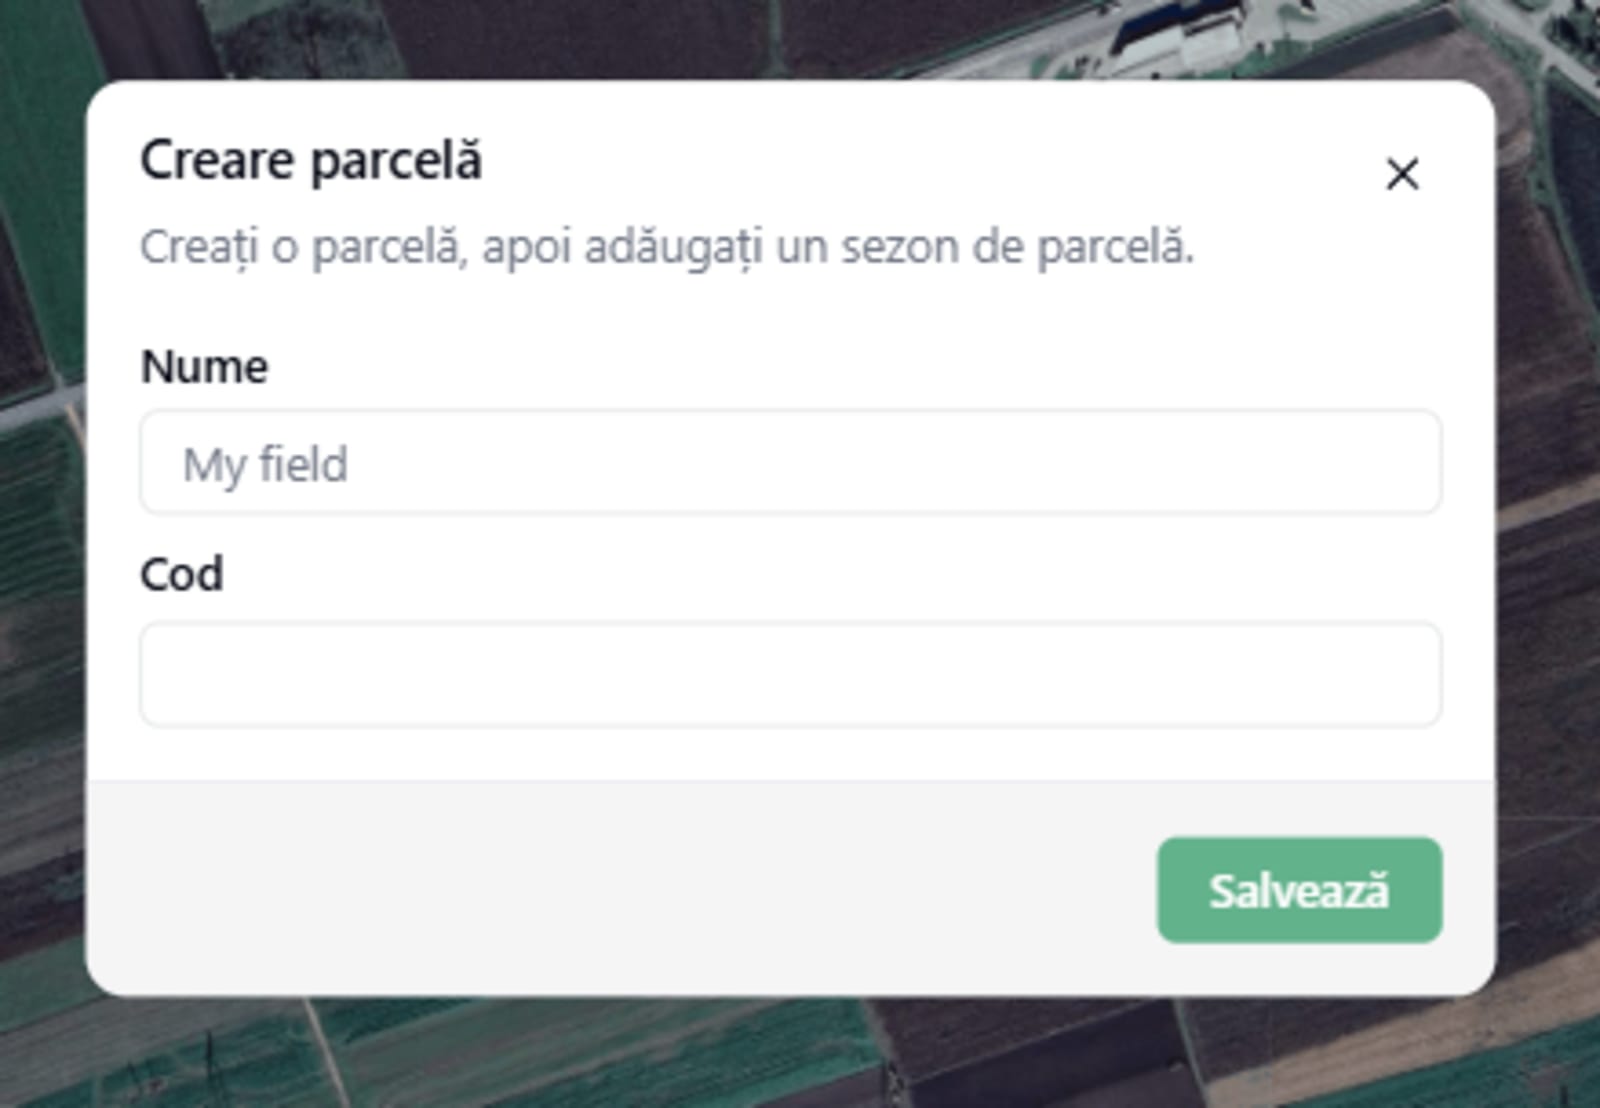
In the empty field editor click the green Create new button. A small dialog opens with two inputs:
- Name (required) — Whatever you call this field day to day. "Far west", "House plot", "Block 12" — anything memorable.
- Code (optional) — An internal identifier.
Press Save. Your field now shows up as a row in the field list.
Step 3 — Open the field actions
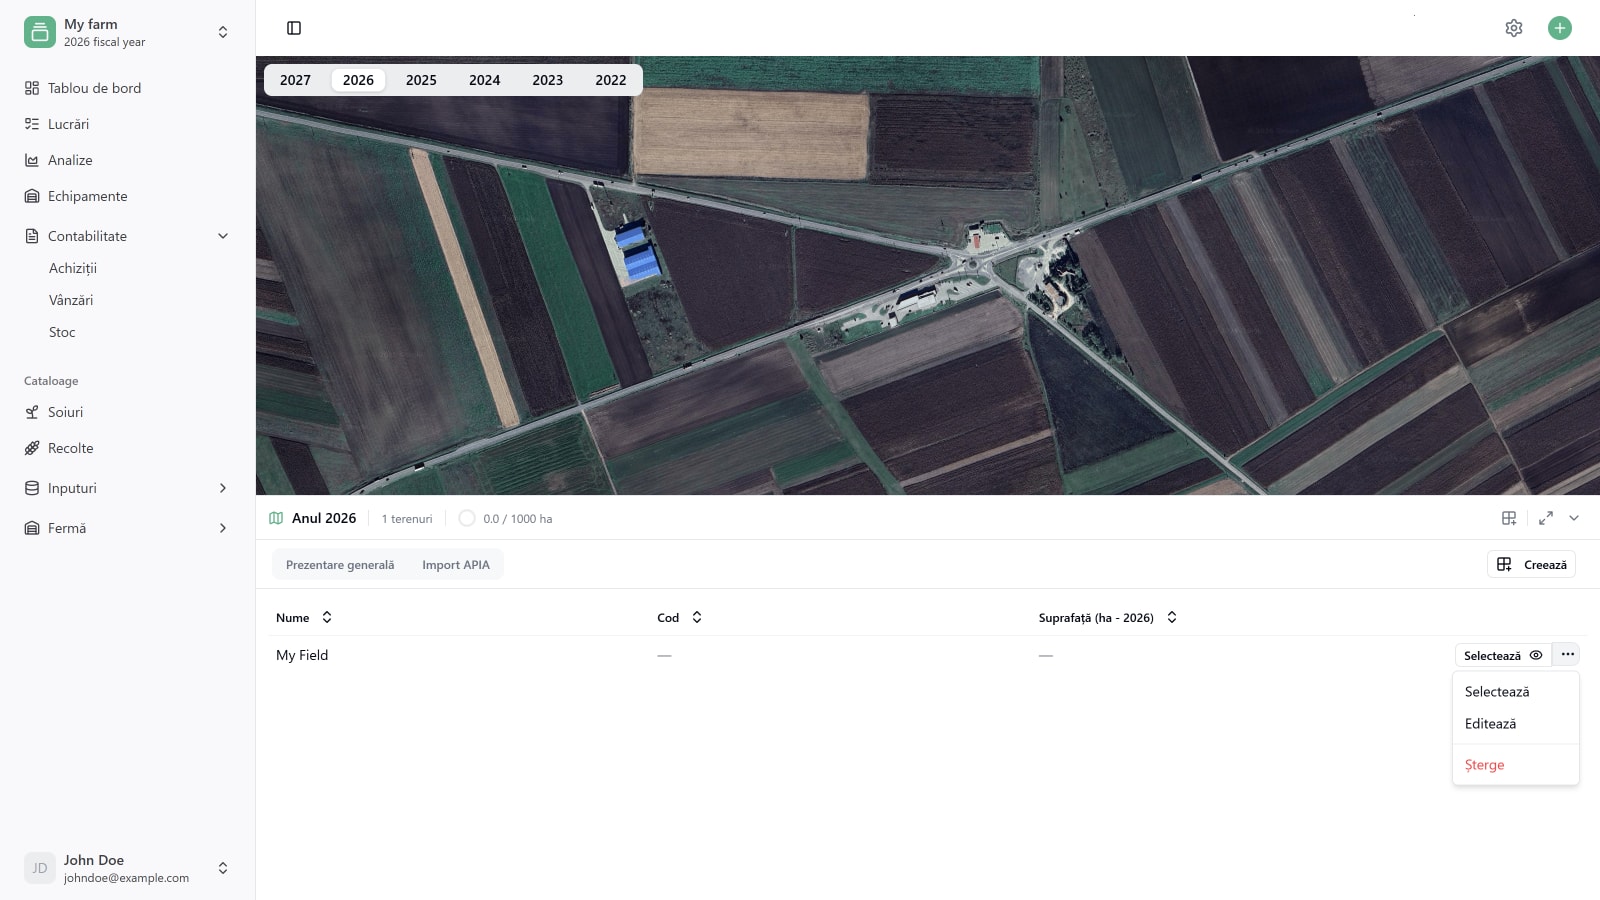
A field on its own is just a label — it has no boundary yet. To add its first season, open the actions menu on the right side of the field's row. Three options appear:
- Select — Opens the list of fiscal years for this field. This is the one you want now.
- Edit — Change the field's name or code.
- Delete — Remove the field. Use this with care: deleting a field also deletes every season, every drawing and every operation tied to it.
Click Select.
Step 4 — Add a field season
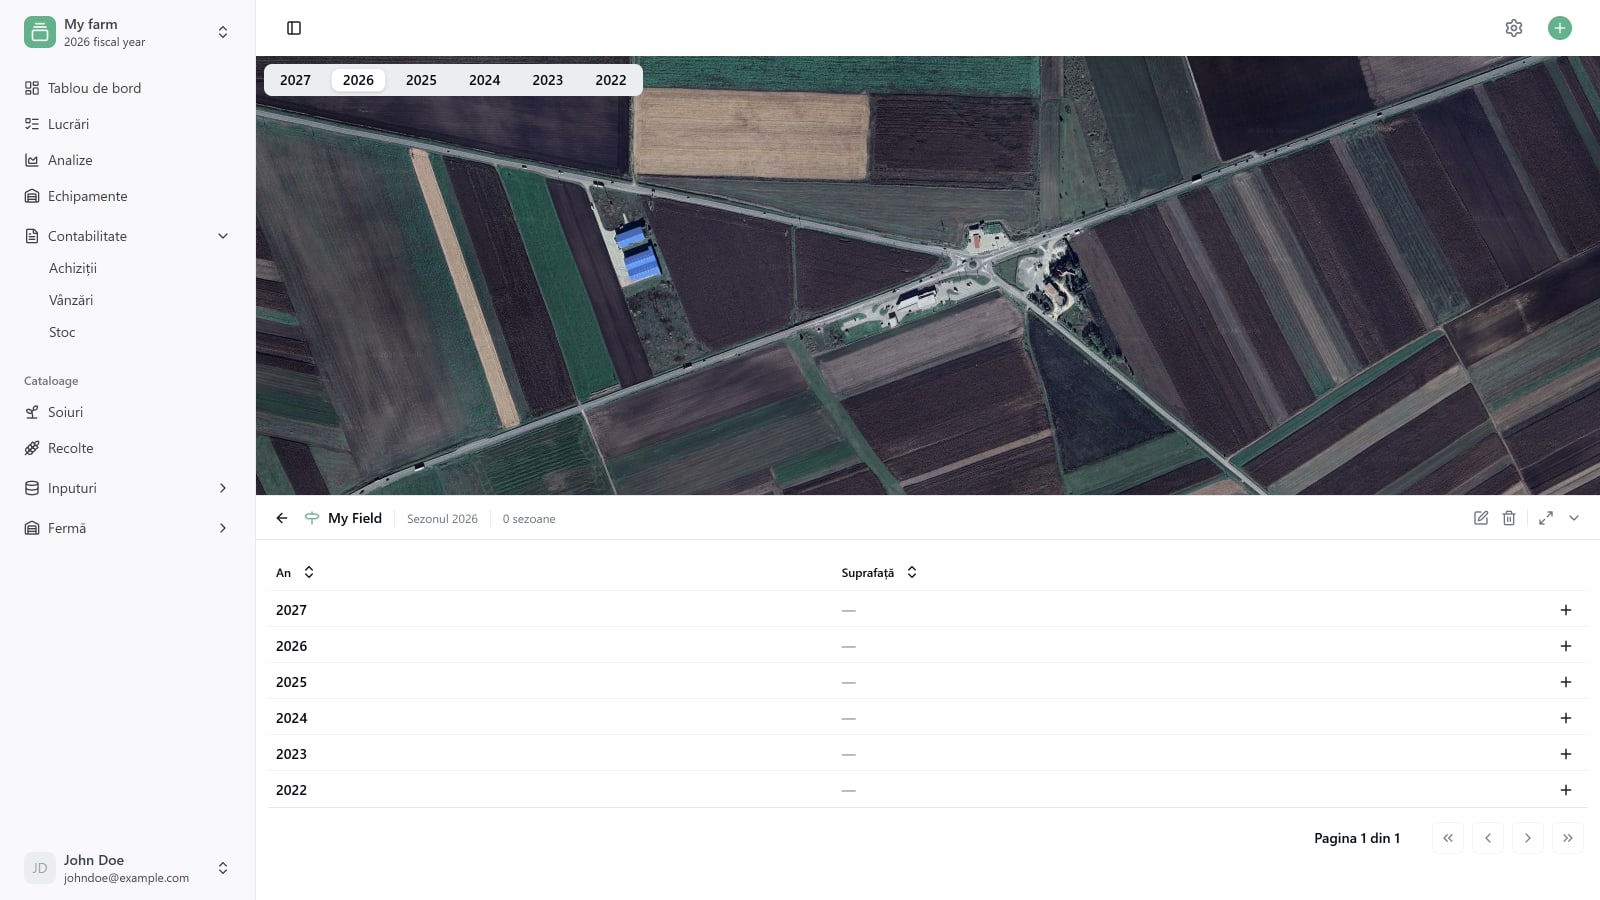
After selecting the field, the panel switches to show one row per fiscal year — 2027, 2026, 2025, 2024, 2023, 2022. Each row stands for a possible season on this field.
To start a season, find the year you want and press the + button at the end of its row.
You only need to create a season for years you actually farmed this field. There's no obligation to fill in every row — you can come back next year and add the following season then.
Step 5 — Draw the boundary on the map
The bottom panel closes and the map fills the screen. You're now in drawing mode. Click on the map to drop a pin at each corner of your field.
A few rules to keep the shape clean:
- Pick a starting corner and walk around the field in one direction — clockwise or counter-clockwise, but don't switch halfway. The shape closes automatically when you reach the start.
- Use as many pins as you need. A square field needs four; an irregular one can take twenty.
- After you drop a pin you can drag it to fine-tune its position.
When two corners sit very close together, dropping the second pin can be fiddly because it lands on top of the first. The trick: drop the new pin somewhere further away on the map, then drag it back close to its neighbour. Much easier than trying to nail the exact spot in one click.
At the bottom of the screen, a small action panel shows the live surface area of the shape you're drawing and four controls:
- Undo last action — Removes the last pin you placed.
- Delete all — Clears every pin so you can start over.
- Cancel — Throws the drawing away and exits the editor.
- Save — Stores the boundary and creates the season.
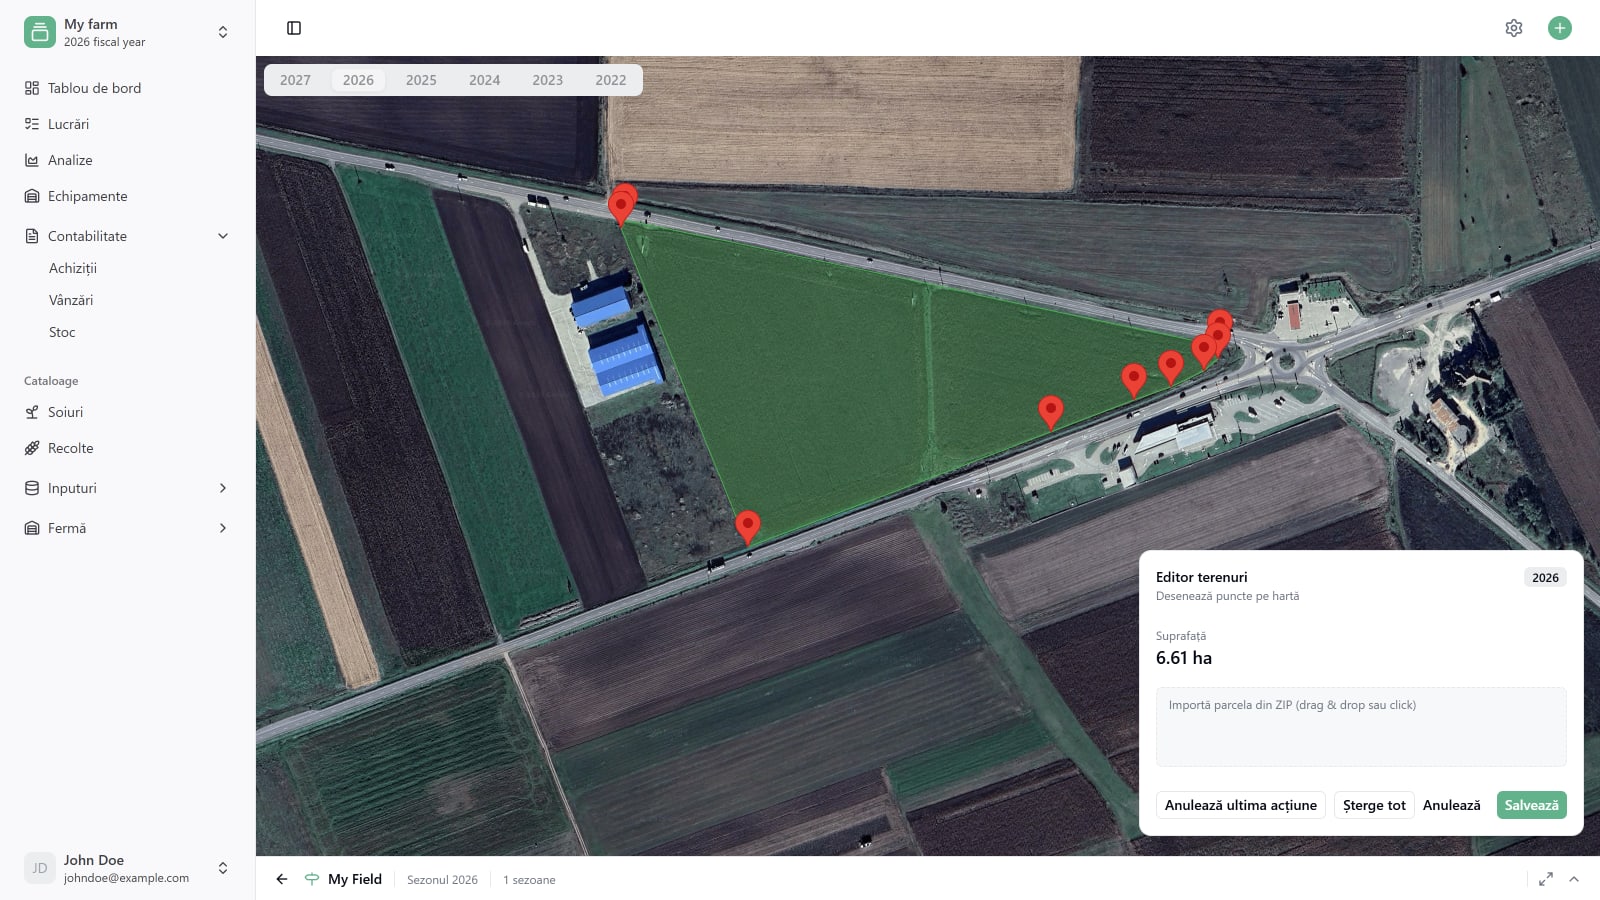
When the shape matches your real field, click Save. The season is created and the boundary is locked in for that year.
Already have the shape in APIA?
If you've already declared this parcel in the APIA system, you don't have to redraw it. The same action panel accepts an APIA .zip archive — drag it onto the panel (or click to browse) and Harvest Mate pulls the boundary straight out of the shapefile.
When you export from APIA for a single field, make sure you select only that specific parcel before exporting. Full step-by-step instructions are in the Import from APIA guide.
Reusing a shape for another season
Most of the time, a field has the same boundary year after year — same plot, same corners. Redrawing it every fiscal year would be wasted work, so Harvest Mate lets you copy an existing season's shape onto a new one.
Here's how:
- With your field still selected, click the year you want to add — for example 2025 — to start that new season.
- The drawing editor opens, but this time leave the map alone for a moment.
- Click the small arrow at the bottom of the screen to slide the season list back up.
- Next to every year that already has a shape, you'll see a copy icon. Click it on the season you want to clone from.
- The boundary appears on the map under your new season. Adjust any pin if you need to, then click Save.
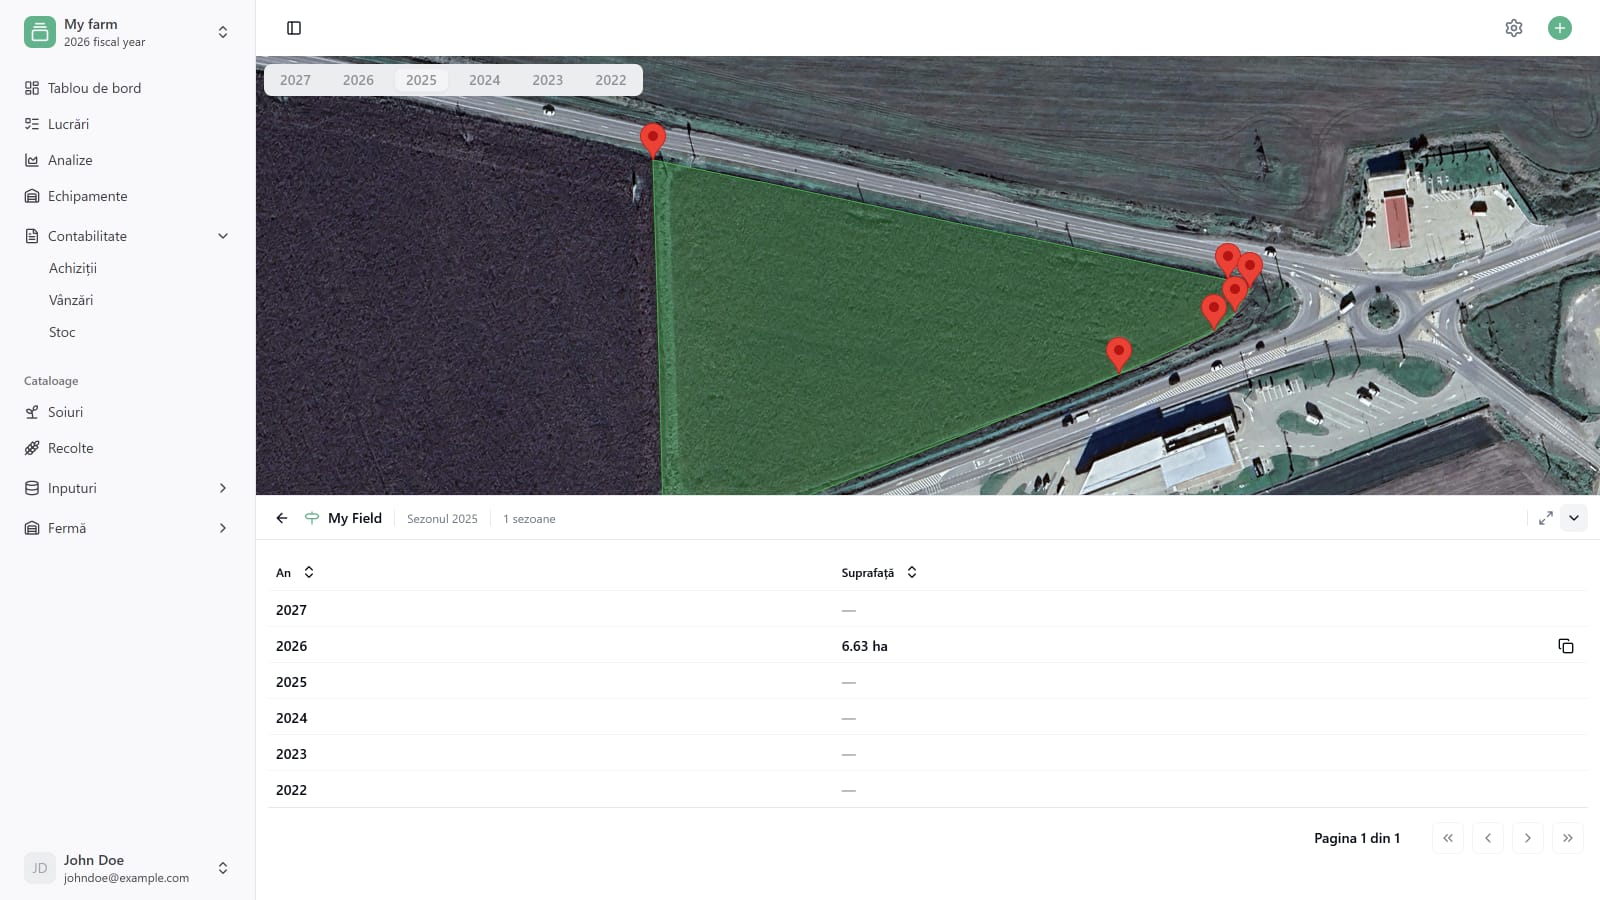
Copying duplicates the shape only — not the land wage, not the cultures. Each season stays independent, which is exactly what you want when boundaries or rents change from one year to the next.
What's next
You now have a field with a real boundary on the map. From here you can:
- Repeat the same steps for the rest of your fields — or, much faster if you've already filed with APIA, import every parcel in one go.
- Plan the year's crop by adding a culture to the season (the subsidy is stored on the culture, not on the season).
- Start logging operations against the field. Every job you record rolls up into the cost-per-hectare for this season.